 |
Images can make your presentation
much more attractive and interesting to your audience... as long as you
don't overwhelm them with eye candy!
The method for inserting an image onto a single slide is much the same as
for inserting an image on a master, in the previous lesson. On a slide,
AutoLayout may change the layout for you, especially in PowerPoint 2002. |
 |

Where you are:
JegsWorks > Lessons > Presentations
Before you start...
Project 1: PowerPoint Basics
Project 2: PowerPoint Formatting
Project 3: Advanced PowerPoint
Outline
Images

 Master
Background Master
Background
 Master
Image Master
Image
 Slide
Image Slide
Image
 Animate
Images Animate
Images
Tables & Charts
Finishing
Summary
Quiz
Exercises
Search
Glossary
Appendix
|
|
Insert Image: Will AutoLayout change things?
What happens when you insert an image onto a slide depends
on:
- AutoLayout - on or off
- Placeholders - empty or already have content
- Type of image - clip art or photo
- Version - PowerPoint 2002 or 2003
AutoLayout on =
 Automatically positions and sizes any
clip art or images you insert to match one of the standard Slide
Layouts. Automatically positions and sizes any
clip art or images you insert to match one of the standard Slide
Layouts.
 AutoLayout does not seem to affect photos or clip art in PowerPoint 2003.
AutoLayout off = Centers image on slide on top of
any existing content. Size of photos will be large. Clip art will be fairly
small.
Ways to turn AutoLayout on/off:
-
 Dialog:
Open the AutoCorrect dialog:
| |
and check or uncheck the last
item = Automatic layout for inserted objects Dialog:
Open the AutoCorrect dialog:
| |
and check or uncheck the last
item = Automatic layout for inserted objects
-
 AutoLayout
SmartTag: When you insert an image and AutoLayout is on, you will see AutoLayout
SmartTag: When you insert an image and AutoLayout is on, you will see
 an AutoCorrect SmartTag at the bottom right of the image. When your mouse
moves over this tag, an arrow appears. Clicking the arrow opens a menu with
choices about how you want AutoLayout to behave. If you did not want the
layout applied to the image, just click on
Examples, using
 PowerPoint 2002:
Rotate or Flip an Image
You can rotate or angle an image on a slide or master. Flipping
creates a mirror image, either horizontally or vertically. (See
Method 3 below)
Method 1: Drag
The
green circle at the top center of a selected image is a rotation handle. Hover over the handle
and the mouse pointer shape changes to a circular
arrow
 . Drag the mouse in the
direction you want the image to rotate. While dragging, the mouse pointer
changes to 4 arrows in a circle . Drag the mouse in the
direction you want the image to rotate. While dragging, the mouse pointer
changes to 4 arrows in a circle
 . .
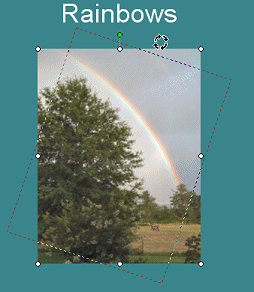 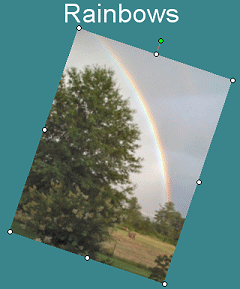
Dotted lines show the new position for the image
while you are dragging.
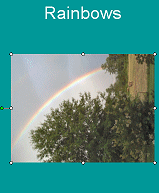
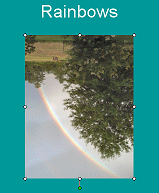
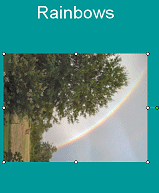
Method 2: Picture Bar - Rotate Left button

The Picture toolbar appears when you select a picture. The Rotate Left button
 rotates the image 90º left. The button is a good
choice when all you want is 90º, 180, or 270º rotation. You don't have to
guess whether the image is straight yet or not! rotates the image 90º left. The button is a good
choice when all you want is 90º, 180, or 270º rotation. You don't have to
guess whether the image is straight yet or not!
 |
 |
 |
 Rotate Left
once: 90º Rotate Left
once: 90º |
 Rotate Left
twice: 180º Rotate Left
twice: 180º |
 Rotate Left
3 times: 270º Rotate Left
3 times: 270º |
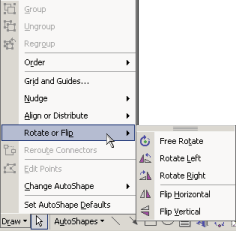
Method 3: Drawing Bar - Rotate or Flip
The Draw button
 on the Drawing Bar opens a menu with a submenu Rotate or
Flip, containing the choices: on the Drawing Bar opens a menu with a submenu Rotate or
Flip, containing the choices:
 Free Rotate - Changes the mouse pointer to the Rotation shape. You must
position the pointer over a handle before you can actually rotate the
image.
 Rotate 90º left
 Rotate 90º right
 Flip horizontally
 Flip vertically
 |
Step-by-Step:Slide Image |
 |
What you will learn: |
to add an image to a slide
to position and resize image on the slide |
Start with:  ,
nz-bar.ppt ,
nz-bar.ppt
AutoLayout On
AutoLayout controls what happens when you insert a
picture or other object.
-
From the menu, select ||
tab.
-
 Be
sure that there is a check mark beside the item Automatic layout for
inserted objects. Be
sure that there is a check mark beside the item Automatic layout for
inserted objects.
Slide: Insert Picture From File
- If necessary, open nz-bar.ppt from your
Class disk.
-
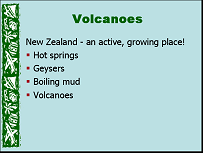 Select
the Volcanoes slide so that it displays in the Slide Pane. Select
the Volcanoes slide so that it displays in the Slide Pane.
- From the menu, select |
| The Insert Picture dialog appears.
- Navigate, if necessary, to the copy on your hard disk of the
resource files.
-
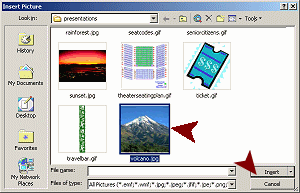 Select
the image volcano.jpg and click the
Insert button in the dialog. Select
the image volcano.jpg and click the
Insert button in the dialog.
The
image appears on the slide.
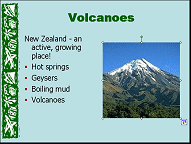  The image is sized to fit at the right and with the text
placeholder re-sized to fit at the left.
That first line could look better. You need to resize the
placeholder and move the image a bit.
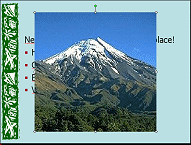  The image is centered on top of the placeholder and is full size.
Adjust Layout
Placeholders and pictures are allowed to overlap each other, but the standard
layouts do not do this. You don't want an image cover up any text, of course.
Be careful to position and size your image so that it is
clear of all the actual text, even though it overlaps the placeholder.
-
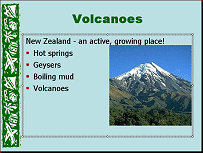  Click
in the text placeholder to select it. Click
in the text placeholder to select it.
-
 Drag the right side to the right until the first line fits across
the slide. Drag the right side to the right until the first line fits across
the slide.
-
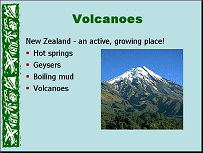 Click
on the picture to select it. Click
on the picture to select it.
-
 Drag a corner to make the image smaller.
- Drag the picture down until it is clear of the text.
 Save
As nz-pictures.ppt to your Class
disk. Save
As nz-pictures.ppt to your Class
disk.
  If you plan
for your images to overlap placeholders, turn off AutoLayout before you insert
the images. You will save a lot of re-formatting steps! If you plan
for your images to overlap placeholders, turn off AutoLayout before you insert
the images. You will save a lot of re-formatting steps!
More Pictures
- Similar to the steps above, add the following images from
the resource files:
map-nz.gif to the Title slide
rainforest.jpg to the slide Rain Forests
beach.jpg to the slide Ocean and Beaches
sunset.jpg to the slide Cities
- As necessary, adjust the placeholder size and image position.
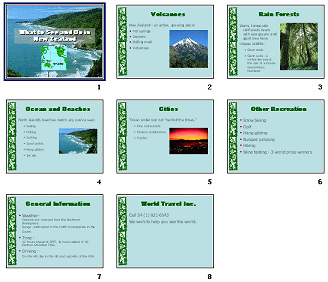
 Save to your Class
disk. [nz-pictures.ppt] Save to your Class
disk. [nz-pictures.ppt]
 Try not to
enlarge the photos as you are moving them. Photos get
fuzzier when enlarged since they are bitmap images. Try not to
enlarge the photos as you are moving them. Photos get
fuzzier when enlarged since they are bitmap images.
Insert Image: Clip Art
PowerPoint and other Office programs come with some clip art images. Usually
you would want to use either all photos or all clip art to keep the same "look" for
your presentation.
- Select the last slide.
- From the menu select ||The Task Pane changes
to the Insert Clip Art pane.
-
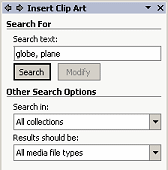 Type
globe, plane in the search box. Type
globe, plane in the search box.
If necessary, change the search options to:
All collections
All media file types
- Click the Search button.
The pane starts showing thumbnails of clip art with the keyword
globe and the keyword
plane.
-
 Select in
the Clip Art results the image of a globe and a plane
at the right. Select in
the Clip Art results the image of a globe and a plane
at the right.
 If you cannot find this particular image, choose a similar image from the results pane. If you cannot find this particular image, choose a similar image from the results pane.
- Click the image in the results pane. The clip art image is
inserted on the slide.
If AutoLayout is off or you are using
 PowerPoint 2003, your image is centered on the slide but is on top of the
text placeholder. That is fine this time.
If AutoLayout is on, in
 PowerPoint 2002 your text placeholder was resized and the image is at the
right center of the slide. The next step handles that issue!
-
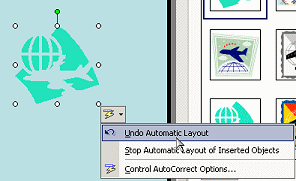  If
you see a Smart Tag at the bottom right of the image, then AutoLayout was on.
Hover over the arrow to open the Smart Tag menu and then click on
. If
you see a Smart Tag at the bottom right of the image, then AutoLayout was on.
Hover over the arrow to open the Smart Tag menu and then click on
.
This puts the image in the center on top of the text placeholder.
-
 Drag
the image to the bottom right corner of the slide. Drag
the image to the bottom right corner of the slide.
- Center the title and the two text lines on the slide.
Flip & Rotate Image
For a bit of practice, you will flip and rotate the new image.
-
 While
the image is selected, from the Drawing bar, click on While
the image is selected, from the Drawing bar, click on
 the Draw button.
- Hover over Rotate or Flip to open the submenu.
-
 Select Flip Horizontal. The image changes so that the
airplane is pointing the the right. Select Flip Horizontal. The image changes so that the
airplane is pointing the the right.
 While the
image is still selected, move your mouse over the green rotation handle
and drag to the left to put the image at an angle. While the
image is still selected, move your mouse over the green rotation handle
and drag to the left to put the image at an angle.
Notice that the line from the center handle to the rotation handle is slanted,
a rough measure of how much you have rotated the image.
Recolor Clip Art
You probably noticed that the color of the clip art was not a good match for
the colors in the slide. Not to worry! The Picture toolbar includes a helpful
Recolor button.
If an image has just a few colors, it is easy to change those colors to match
the color palette of your presentation. Images that have a lot of colors or a
number of similar shades are hard to recolor.
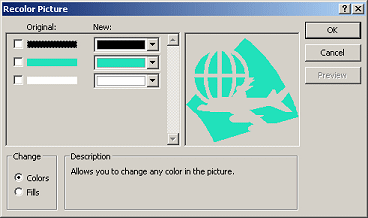 If
necessary, select the clip art image you just inserted. The Picture toolbar
appears. It may be floating or it may be docked among the other toolbars. If
necessary, select the clip art image you just inserted. The Picture toolbar
appears. It may be floating or it may be docked among the other toolbars.
- Click on
 the Recolor button on the
Picture toolbar. The Recolor Picture dialog appears with the original
image showing. the Recolor button on the
Picture toolbar. The Recolor Picture dialog appears with the original
image showing.
(Choose the correct button! The Recolor Picture button
 is not the same as is not the same as
 the Fill Color button on the Drawing bar.)
The dialog will show a color bar for each color in the picture. You will have
to scroll to see all of the colors when there are more than 6 or so.
-
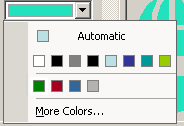 Click
the arrow at the right of the blue-green bar in the middle. A color
palette opens. Click
the arrow at the right of the blue-green bar in the middle. A color
palette opens.
The first row of colors is the colors in the Color Scheme. The
next row is the colors you have chosen while working on the presentation.
None of these colors is the green in the image at the left
of the slide.
- Click on the link More Colors... The
Colors dialog opens.
- If necessary, switch to the Standard tab.
-
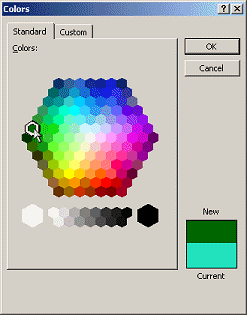 Select
the green that is the first hexagon on the 6th row and click on OK
to close the Colors dialog. Select
the green that is the first hexagon on the 6th row and click on OK
to close the Colors dialog.
- Click on OK to close the Recolor Picture dialog. Your clip
art is now a matching green.

 Save to your Class
disk. [nz-pictures.ppt] Save to your Class
disk. [nz-pictures.ppt]
 How to handle a full Class disk

   
~~ 1 Cor. 10:31 ...whatever you do, do it all for the
glory of God. ~~
Last updated:
30 Apr 2012 |

