|
Exercise Database 2-2: City Theater
Productions
|
What you will do: |
Create a new blank database
Create tables manually
Enter data
Use the Lookup wizard
Create a query that sorts
Use AutoForm
Modify form in Design View
Use AutoReport
Modify report in Design View
 Change report to 2 columns
Create a data access page
Print all records
Print selected records |
Start with:
Access open
The City Theater needs a database to keep track of their productions
over the years.
- Create a new blank file called
citytheaterproductions.mdb on your
Class disk in the folder databases project 2.
(Create the folder if necessary.)
-
 Create and save the following tables in Table Design View and
enter the data displayed.
Create and save the following tables in Table Design View and
enter the data displayed.Table name = Production Types
Fields:
- ProductionTypeID - AutoNumber type; primary key
- ProductionType - Text type
|
ProductionTypeID |
ProductionType |
|
1 |
play |
|
2 |
musical |
|
3 |
concert |
|
4 |
reading |
|
5 |
dance |
|
6 |
pageant |
|
7 |
other |
Table name = Seasons
Fields:
- SeasonID - AutoNumber type; primary key
- Season - Text type
|
SeasonID |
Season |
|
1 |
Winter |
|
2 |
Spring |
|
3 |
Summer |
|
4 |
Fall |
|
5 |
Christmas |
Table name: Venues
Fields:
- VenueID - AutoNumber type; primary key
- Venue - Text type
- External - Yes/No type
(For the field External, a Yes is the same as a checkmark in the
box.)
|
VenueID |
Venue |
External |
|
1 |
Main
Theater |
No |
|
2 |
Little
Theater |
No |
|
3 |
School |
Yes |
|
4 |
City Park |
Yes |
|
5 |
Palace
Theater |
Yes |
|
6 |
Amphitheater |
Yes |
|
7 |
Fair
grounds |
Yes |
|
8 |
Other |
Yes |
Table Name = Productions.
Fields:
- ProductionID - AutoNumber type; primary key
- ProductionName - Text type
- Director/Conductor - Text type
- ProductionTypeID - Lookup field using the Production Types table.
Sort Ascending on ProductionType field.
- Author - Text
- SeasonID - Lookup using Seasons table. Sort on SeasonsID since the
seasons of the year are not in alphabetical order.)
- Year - Number with Integer field size
- VenueID - Lookup using Venues table. Do not include the field
External in the Lookup list. Sort on Venue field.
- Notes - Memo type
For fields that have a Lookup list, be sure to select
from the list when entering records.
|
ProductionID |
ProductionName |
Director/Conductor |
ProductionType |
Author |
SeasonID |
Year |
VenueID |
Notes |
|
1 |
My Fair
Lady |
Peter
Fellows |
musical |
Alan Jay
Lerner |
Winter |
2005 |
Main
Theater |
|
|
2 |
Romeo &
Juliet |
Jared
Mason |
play |
William
Shakespeare |
Spring |
2004 |
Little
Theater |
|
|
3 |
West Side
Story |
Peter
Fellows |
musical |
Leonard
Bernstein, Stephen Sondheim |
Winter |
2004 |
Main
Theater |
|
|
4 |
Cats |
Peter
Fellows |
musical |
TS Eliot,
Andrew Lloyd Webber |
Christmas |
2004 |
Main
Theater |
|
- In Design view, add a Description to the fields that
use Lookup lists that tells which table is being used. Add a
Description to the field Year: Year in which
production was performed
-
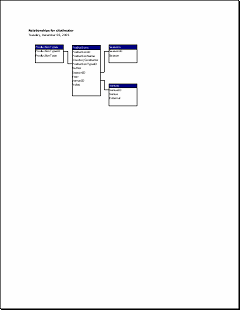 View
the Relationships. View
the Relationships.
 Print the Relationships.
- AutoForm: Use AutoForm to create a form based on the
Productions table. Adjust the controls as needed to make the form easier
to use. Make sure that the value in the field Director/Conductor shows
completely for all records.
-
 Save the form as Productions Form. Save the form as Productions Form.
- Use the form to enter the records below.
|
ProductionID |
ProductionName |
Director/Conductor |
ProductionType |
Author |
SeasonID |
Year |
VenueID |
Notes |
|
5 |
London
Philharmonic Orchestra |
Manuel
Sanchez |
concert |
|
Fall |
2004 |
Main
Theater |
guest
conductor - Manuel Sanchez |
|
6 |
Balshoi
Ballet |
Yuri Popov |
dance |
|
Christmas |
2005 |
Little
Theater |
only 1
performance |
|
7 |
Thai
Dancers |
Kaem
Manuwaluilou |
dance |
|
Spring |
2005 |
Palace
Theater |
3
performances for Cancer Fund |
-
Add to record #3, West Side Story, the following text in the Notes
field:
Excellent reviews in local paper. National press
commented favorably on the innovative staging and costuming. Sold out
for 99% of performances. Special performances as fund-raisers for local
rescue squad and Heart Association at $200 per ticket also sold out.
Do not resize the Notes field this time.
-
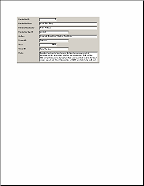  Print the form for record #3 only. The Notes field will not display completely
at the default size. (HINT: You can select the record and then print
Selected Records, or you can filter to show only that record and then
print.)
- Query: Create a query that sorts the records in the
Productions table on the year and then the season. (HINT: The field Year must
be to the left of the field Seasons in the query's grid.)
- Save the query with the name QProductions-Year/Season
- AutoReport: Use AutoReport to create a report based on
the query you just created.
- Add to the report's Page Footer a control to show the page number
and total number of pages, Page N of M. (HINT: Insert | Page Numbers...)
- Make adjustments as needed to make the data display properly in the
report. Resize controls where needed. Rearrange controls if you
wish. Set the Can Grow and Can
Shrink properties to Yes where it makes sense.
-
 Save the report as Productions Report.
 Print all of
the report's pages. (You may have a different number of
pages, if you
rearranged the fields.)
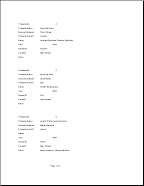
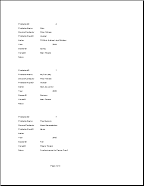
  Change the report to use 2 columns. Change the report to use 2 columns.
Reduce the width of the wider controls on the report and change the
detail width to fit in 4 inches. In the Page Setup dialog, on the
Columns tab, use 2 columns and check the box for Same as Detail. On the
Margins tab, change the Left and Right margins to 0.5". View the Print
Preview again. -
 Save as Productions Report-2 columns. Save as Productions Report-2 columns.
 Print the report's 2 pages.
-
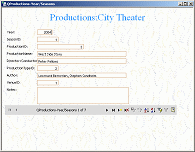 Create a data access page. Use the query that you
created as the source. Apply the theme of your choice. Create a data access page. Use the query that you
created as the source. Apply the theme of your choice.
- Make adjustments in Design View, if necessary, so that the longer
values show completely.
-
 Save as Productions-byYearSeasons.htm to
your Class disk in the folder databases project2.
 Print only the data access page that shows record for West
Side Story.
|

